Why Whitening Pedicures at Home Are a Great Idea
Maintaining beautiful, bright feet doesn’t always require expensive spa visits. Whitening pedicures, once considered a luxury, are now easily achievable at home. The convenience and cost-effectiveness of DIY pedicures make them an attractive option for anyone looking to enhance their foot care routine. This guide offers a comprehensive, step-by-step approach to achieving a professional-looking whitening pedicure in the comfort of your own home, saving both time and money while ensuring your feet look their best. The key is to be consistent and use the right techniques and products tailored for your skin type.
Benefits of At-Home Whitening Pedicures
At-home whitening pedicures offer several compelling benefits, making them a preferred choice for many. Primarily, they are significantly more affordable than professional spa treatments. You can invest in a few basic supplies once and use them repeatedly, drastically reducing the long-term cost. Furthermore, the flexibility of doing a pedicure at home allows you to fit it into your schedule without the constraints of salon appointments. You can pamper your feet anytime, anywhere. Also, you have complete control over the products used, enabling you to avoid harsh chemicals and choose natural, skin-friendly ingredients.
Cost Savings

The financial benefits of performing whitening pedicures at home are substantial. Spa pedicures can be costly, especially when considering regular maintenance. However, the initial investment in supplies for an at-home pedicure is minimal. This includes items like nail clippers, files, exfoliating scrubs, moisturizers, and potentially some whitening agents. Once you have these, the ongoing cost involves replenishing products as needed, which is far more economical than paying for each spa visit. Over time, these savings accumulate, leaving you with beautifully cared-for feet and extra money in your pocket.
Convenience and Flexibility
The convenience of performing a whitening pedicure at home cannot be overstated. You can set your schedule, choosing a time that fits best into your busy life. There’s no need to book appointments or travel to a salon, saving valuable time and effort. You can create a relaxing spa-like experience whenever you desire. Doing a pedicure at home is also perfect for individuals with mobility issues or those who prefer the comfort and privacy of their own space. You’re in complete control of the environment, music, and the pace of the treatment.
Step 1 Prepare Your Feet
The first step in achieving a successful at-home whitening pedicure is proper preparation of your feet. This crucial stage ensures that your skin is ready to absorb the benefits of subsequent treatments. Begin by gathering all your necessary supplies and creating a clean, comfortable workspace. Then, thoroughly cleanse your feet to remove any dirt, sweat, or product residue. Proper preparation maximizes the effectiveness of the whitening treatments, setting the stage for brighter, healthier-looking feet. Taking your time with this step will significantly improve the final results of your pedicure.
Gathering Your Supplies

Before you begin, gather the essential supplies for your whitening pedicure. You will need a foot basin or a tub to soak your feet, a soft towel, nail clippers, a nail file, a cuticle pusher, an exfoliating scrub, a whitening agent (such as lemon juice or a specialized whitening product), a moisturizer, and sunscreen. It is also useful to have cotton balls or pads, and a base coat, top coat, and nail polish if you choose to paint your toenails. Make sure all items are clean and within easy reach to make the process smooth and enjoyable. A well-organized setup will contribute to a more relaxing and effective pedicure experience.
Cleaning Your Feet
Start by thoroughly cleaning your feet. Use warm water and a gentle soap to wash away any dirt, sweat, or previous product buildup. This step is important because it removes surface impurities that might interfere with the whitening process. You can use a washcloth or a foot brush to ensure all areas of your feet are clean, including between your toes and around your nails. Rinse your feet well and pat them dry with a soft towel. Proper cleaning prepares the skin for exfoliation and the application of whitening agents.
Step 2 Exfoliate for Brighter Skin
Exfoliation is a vital step in the whitening pedicure process. It removes dead skin cells, revealing brighter, healthier skin underneath. Regular exfoliation also helps to improve the absorption of whitening treatments and moisturizers. There are several methods to exfoliate your feet, including using a commercial scrub or creating your own DIY version. Exfoliating regularly will gradually lighten the skin on your feet and make them feel smoother. Remember to be gentle, especially if your skin is sensitive, to avoid irritation. The key is to create a routine and perform exfoliation consistently.
Creating a DIY Exfoliating Scrub

Making your own exfoliating scrub is a cost-effective and customizable option. A simple and effective scrub can be made using a combination of natural ingredients you likely have at home. A basic recipe includes mixing coarse sugar (brown or white) with a carrier oil, such as olive oil or coconut oil. You can also add a few drops of essential oils, such as peppermint or tea tree oil, for extra benefits and a pleasant scent. Lemon juice can also be added for its whitening properties. The key is to blend the ingredients until you achieve a paste-like consistency.
Applying and Rinsing the Scrub
Once you have your scrub, gently apply it to your feet using circular motions. Focus on areas where dead skin tends to accumulate, such as the heels, soles, and sides of your feet. Massage the scrub into your skin for several minutes. Use gentle pressure to avoid irritation. After exfoliating, rinse your feet thoroughly with warm water to remove all traces of the scrub. Ensure that no residue remains, as it can clog pores and cause skin problems. Pat your feet dry with a soft towel, and proceed to the next step.
Step 3 Soaking Your Feet to Soften
Soaking your feet is an important step in any pedicure. It softens the skin, making it easier to remove dead cells and prepare for whitening treatments. A foot soak can also provide a relaxing experience and relieve tired feet. This step allows the skin to absorb moisture, which increases the effectiveness of the subsequent steps. The temperature of the water and the ingredients in the soak play a crucial role in maximizing the benefits. A well-executed foot soak makes the pedicure more enjoyable and results in softer, brighter feet.
Choosing the Right Foot Soak

When selecting a foot soak, consider ingredients that complement the whitening process. Epsom salts are a great choice; they soothe tired muscles and have mild exfoliating properties. Adding a few drops of essential oils, such as lavender or tea tree oil, can enhance the relaxing effect of the soak. For additional whitening benefits, you can add a few tablespoons of lemon juice or a small amount of baking soda. These ingredients work synergistically to cleanse, brighten, and soften your feet. Be sure to select ingredients that suit your skin type and address any specific foot concerns you may have.
Soaking Time and Temperature
The ideal soaking time is generally between 10 to 15 minutes. This allows the skin to soften without becoming waterlogged. The water temperature should be comfortably warm, not hot. Hot water can dry out the skin, while cold water is not as effective at softening it. Before immersing your feet, test the water temperature to ensure it is suitable. While soaking, relax and enjoy the experience. Once the time is up, gently pat your feet dry with a soft towel, preparing them for the next steps in your whitening pedicure.
Step 4 Whitening the Skin
The core of a whitening pedicure lies in the application of whitening agents. These products work to reduce discoloration, lighten dark spots, and brighten the overall appearance of your feet. Several ingredients can be used effectively, including lemon juice, baking soda, and specialized whitening creams or masks. It’s important to use these treatments safely and consistently. Remember to perform a patch test before applying any new product to ensure you don’t have any adverse reactions. The careful application of these agents delivers visible results and a more radiant look.
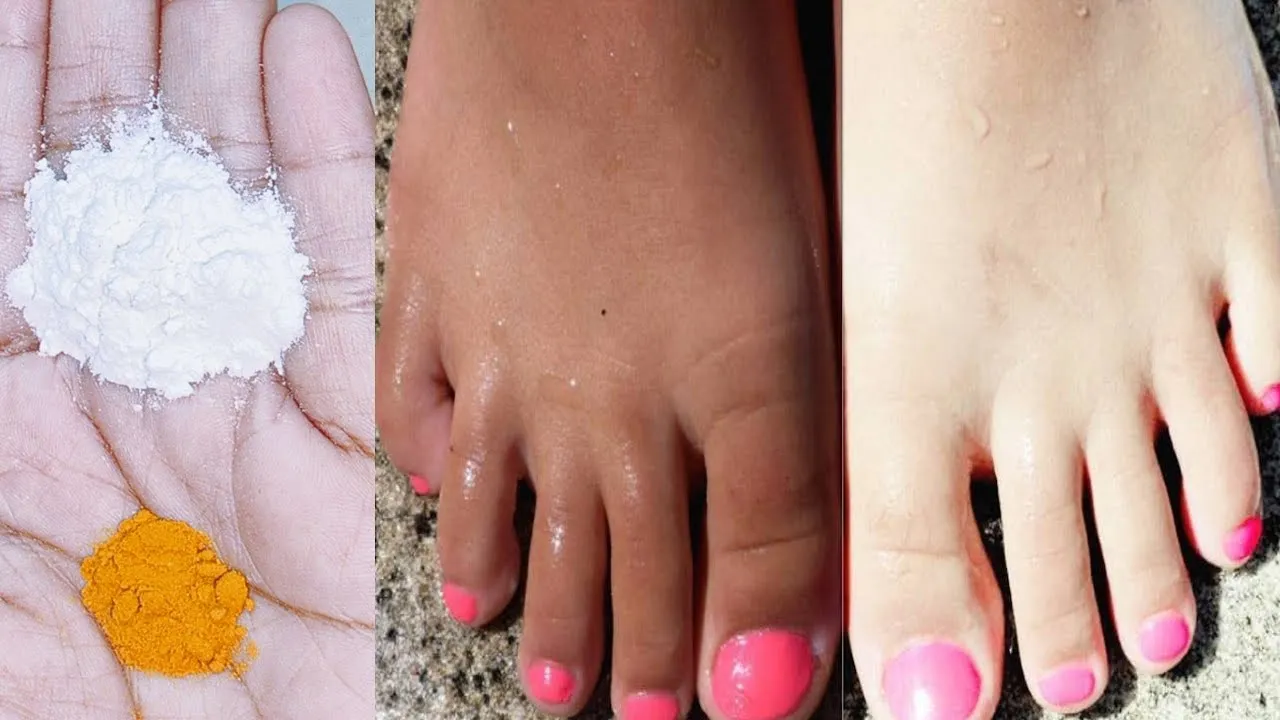
Using Lemon Juice and Baking Soda

Lemon juice and baking soda are natural and effective ingredients for whitening skin. The citric acid in lemon juice helps to lighten dark spots and brighten the skin. Baking soda acts as a gentle abrasive that helps to exfoliate and remove dead skin cells. To create a whitening paste, mix fresh lemon juice with baking soda to form a thick mixture. Apply this paste to the areas of your feet that need whitening, such as the heels and sides. These natural ingredients are very accessible. However, it is very important to proceed with caution.
Application and Duration
When applying the whitening paste, use a cotton ball or pad to gently apply the mixture, focusing on areas with discoloration. Leave the paste on your feet for about 10-15 minutes. Avoid excessive exposure, as it can cause skin irritation. If you experience any burning or discomfort, rinse immediately. After the recommended time, rinse your feet thoroughly with lukewarm water. Ensure that all traces of the paste are removed. Pat your feet dry and move on to the moisturizing step. Repeating this process regularly will lead to brighter and more even-toned skin.
Step 5 Moisturizing Is Key
Moisturizing is a critical part of any foot care routine, especially after whitening treatments. Whitening agents can sometimes dry out the skin, so it’s essential to replenish moisture. Regular moisturizing helps to maintain skin health, keeps your feet soft, and enhances the effects of the whitening treatment. Applying a high-quality moisturizer locks in the benefits of the other steps and prevents dryness. The right moisturizer can also contribute to the overall appearance and health of your feet, making this a non-negotiable element of your pedicure routine.
Choosing the Best Moisturizers

When selecting a moisturizer, consider products that deeply hydrate and provide essential nutrients. Look for ingredients such as shea butter, coconut oil, and hyaluronic acid. These ingredients help to lock in moisture and improve skin elasticity. Vitamin E and other antioxidants can protect the skin from damage. For those with dry, cracked heels, consider a richer cream or a foot balm. Always choose a moisturizer that suits your skin type and addresses your specific needs. Using a quality moisturizer ensures that your feet remain soft, supple, and hydrated.
Application Techniques
Apply the moisturizer generously to your feet, paying special attention to dry or cracked areas. Massage the cream into your skin using circular motions to help stimulate circulation and increase absorption. For enhanced results, apply the moisturizer just before bedtime and wear a pair of soft cotton socks to lock in the moisture overnight. This method allows the moisturizer to penetrate deeply and provides maximum hydration. Consistent application of the moisturizer will keep your feet soft, smooth, and well-nourished, maintaining the results of your whitening pedicure.
Step 6 Protect Your Pedicure
Protecting your feet is an important step in maintaining the results of your whitening pedicure. Sun exposure, environmental factors, and daily activities can all affect the health and appearance of your feet. Taking steps to shield your feet from these elements will keep them looking bright, healthy, and radiant. This protection involves the use of sunscreen, protective footwear, and general care practices. A proactive approach extends the benefits of your pedicure, ensuring your feet remain in good condition.
Applying Sunscreen
Sunscreen is essential for protecting your feet from sun damage, which can cause discoloration and premature aging. Apply a broad-spectrum sunscreen with an SPF of 30 or higher to your feet, especially if they will be exposed to the sun. Reapply sunscreen every two hours, or more frequently if you are swimming or sweating. Be sure to cover all exposed areas, including the tops of your feet and around your ankles. Consistent use of sunscreen will help to maintain the even tone of your skin and protect your feet from sun-related issues.
Protecting Your Feet
Beyond sunscreen, protecting your feet involves several additional measures. Wear closed-toe shoes or socks when engaging in activities that expose your feet to potential harm. Avoid walking barefoot in public places, which can expose your feet to bacteria and fungi. Keep your feet clean and dry to prevent infections. Regularly inspect your feet for any signs of damage or changes, and address them promptly. These habits will help safeguard your feet and keep them healthy. Remember to follow a daily foot care routine.
Step 7 Maintain Your Whitening Pedicure
Consistent maintenance is key to sustaining the results of your at-home whitening pedicure. Regular care ensures your feet stay bright, healthy, and beautiful over time. This involves incorporating a routine of regular treatments, paying attention to specific needs, and adapting to changing conditions. By following a consistent maintenance plan, you can maximize the longevity of your results, reduce the frequency of more intensive treatments, and maintain the overall health of your feet.
Regular Maintenance Tips
Implement these maintenance tips to keep your feet in top condition. Continue exfoliating your feet at least once or twice a week, using either your DIY scrub or a commercial product. Moisturize your feet daily, preferably after showering or bathing, to lock in hydration. Apply sunscreen whenever your feet are exposed to the sun. Keep your nails trimmed and filed to prevent ingrown nails and maintain neatness. Consider using a foot file or pumice stone to gently remove any dry or calloused skin. Doing all this will ensure your feet remain healthy and bright.
Frequency of Treatments
The frequency of your at-home whitening pedicure treatments depends on your skin type, lifestyle, and the level of maintenance you desire. Generally, you can perform a full whitening pedicure once or twice a month. In between these full treatments, continue your regular maintenance routine. Adjust the frequency based on how your skin responds and your aesthetic goals. Consistency is the key. As you establish your routine, you’ll find the perfect balance to keep your feet looking their best throughout the year.
Conclusion
Achieving a whitening pedicure at home is a rewarding and accessible process. By following the 7 easy steps outlined in this guide, you can enjoy the benefits of brighter, more beautiful feet without the expense and inconvenience of salon visits. From preparing your feet to applying specialized treatments and maintaining your results, the process is designed to be straightforward and effective. Remember that consistency is key. Embrace this at-home approach to foot care, and watch as your feet transform from dull to dazzling. With a little effort and the right routine, you can step out with confidence, knowing your feet are at their best.